Rate this article :
5/5 | 1 opinion
This article was useful to you ?
Yes
No
Vous avez noté 0 étoile(s)
Sommaire
Procédure
Memcached is an object cache system in RAM memory. It is used to temporarily store frequently used data, such as the results of SQL queries, dynamic objects or binary data, so that they can be retrieved quickly without having to recalculate them each time a page is loaded.
The principle is simple: the data is stored directly in memory, allowing ultra-fast access. This is ideal for relieving the load on your database and improving the overall performance of your site, particularly for dynamic pages (shopping baskets, searches, comments, etc.).
⚠️ Limits to be aware of: As the data is stored in RAM, it is volatile. This means that it is lost as soon as the Memcached service is restarted or the server is rebooted.
Even if your cPanel LWS package already includes a high-performance static page caching system (via the Fastest Cache module, activated by default), some areas of your site cannot be cached in the traditional way.
This is particularly true of dynamic pages such as shopping baskets, instant messaging systems, members' areas, comment threads, product search or filter modules, real-time news lists, etc.
This content changes very frequently and therefore cannot be fully cached. If they are loaded each time from the database (MySQL or PostgreSQL). This can slow down the display of your pages and unnecessarily overload the database server.
This is where Memcached comes into its own. It allows you to temporarily store certain dynamic data in memory, without freezing the entire page. For example, the names of the most popular products, their prices, the results of a complex query, etc.
So instead of restarting an SQL query on each visit, this data is read directly from memory. The result: your site is faster, your visitors have a better experience and your database is under less strain.
There are two different PHP extensions that can be used to enable a PHP script to communicate with a Memcached server: memcache and memcached. It is important to check with the author of your script to find out which of the two is used by your site. To activate one of them :
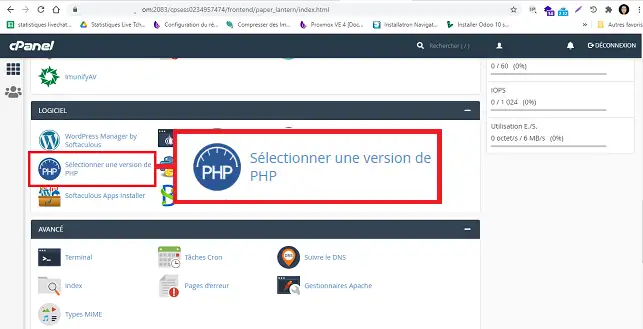
1. Connect to your cPanel interface and click on"Select a PHP version" in the"Software" section.
2. Tick"memcache" or"memcached" as required.
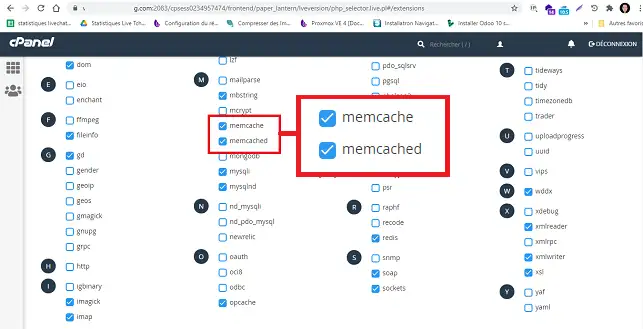
That's it. You can now connect to the memcached servers from your PHP scripts. An instance of memcached is available by default on your cPanel account. Here are the connection details:
The easiest and most effective way to use Memcached on WordPress hosted by LWS (cPanel package) is via the LWS Optimize plugin, developed specifically for our customers.
1. Go to Extensions > Add from WordPress administration.
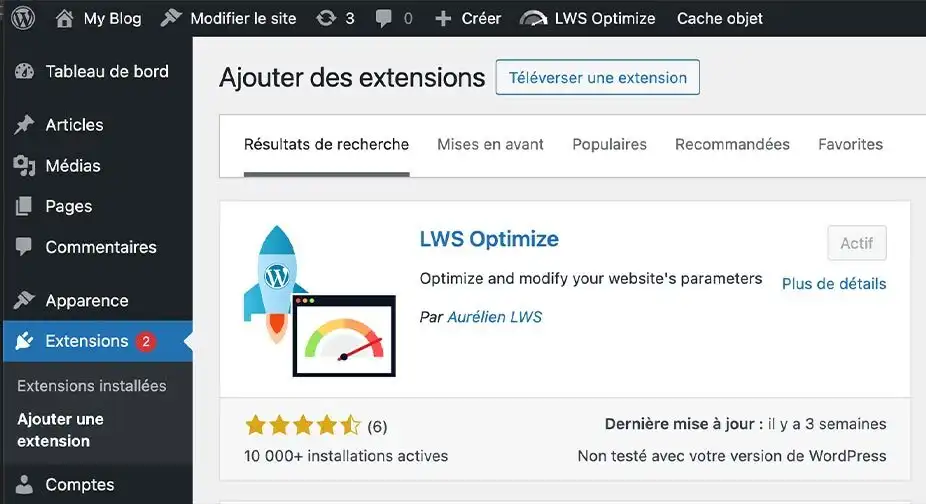
2. Search for LWS Optimize, then install and activate the plugin.
3. Go to the extension settings in the side menu.
4. In the "Caching" tab, activate the Memcached Object Cache option.
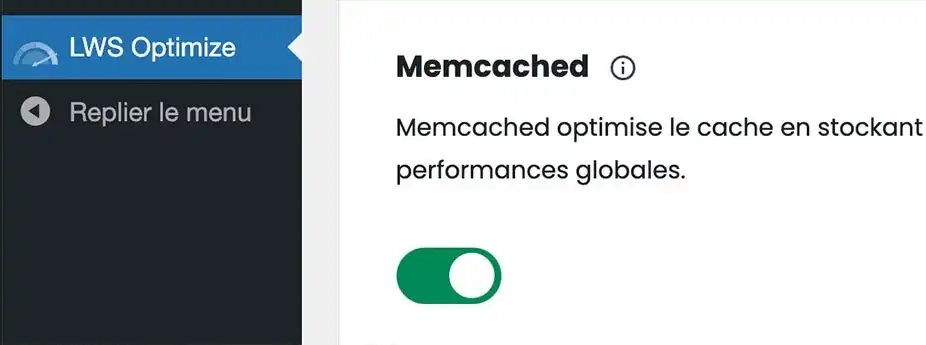
The service is automatically configured.
Recommended for all WordPress sites hosted by LWS: If you're looking for the best performance without the hassle, this is the method for you.
WordPress already has an object cache ecosystem that allows plugins and themes to ask WordPress to store the result of a complex MySQL query in memory. This works with the WP_Object_Cache class. By using memcached as a storage space for WP_Object_Cache, WordPress can take advantage of memcached's performance.
The"Memcached Object Cache" WordPress plugin allows you to do this with the memcache PHP extension, which should be activated beforehand (see previous paragraph). To install it, download the plugin's object-cache.php file and place it in your website's wp-content folder ( using FTP or the cPanel file manager):

Next, you will need to fill in a cache key so that your website knows which data on memcached is its own. This is done by adding the line"WP_CACHE_KEY_SALT" to wp-config.php:
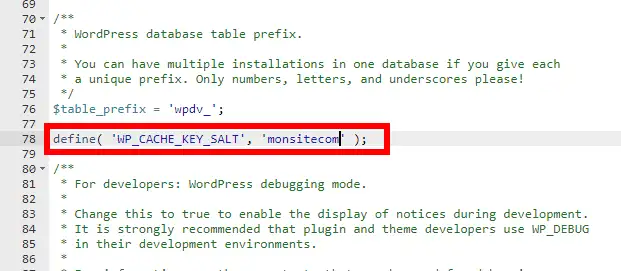
And that's it.
1. Connect to your Wordpress interface and click on"Extension/Add" to install W3 Total Cache.
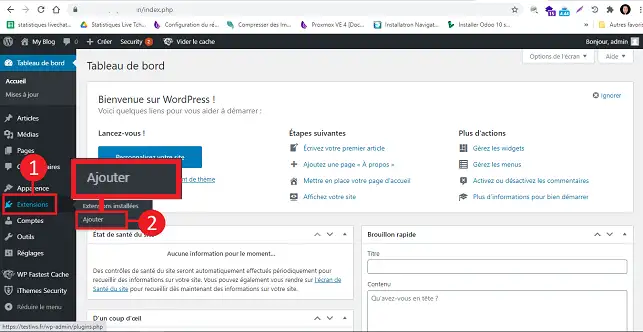
2. Search for the"W3 Total Cache" plugin and click on"Install maintenance".
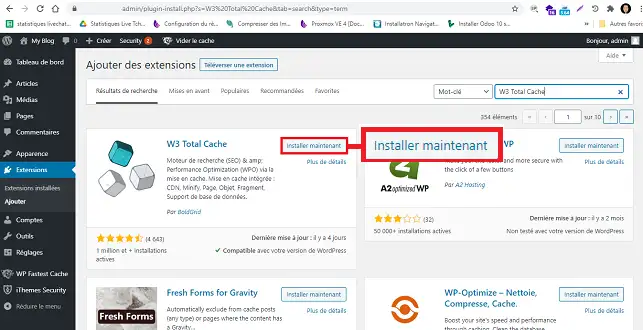
3. Click on"Activate".
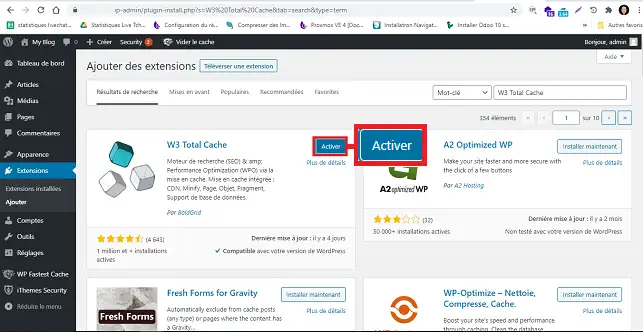
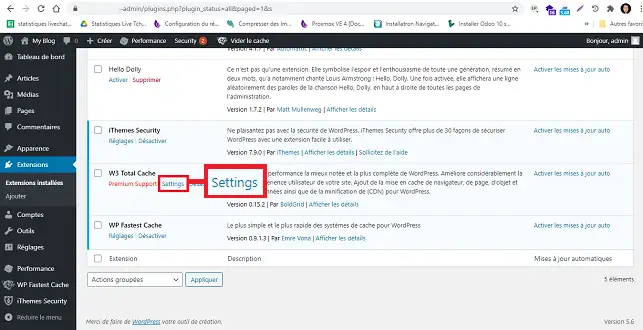
4. Look for the plugin in the list of plugins and click on"Settings" below it.
5. Go to the"Database caching" section, tick the"Enable" box and enter"memcached" in the"Database cache method" section. Finally, click on"Save setting and purge cache" to save your request.
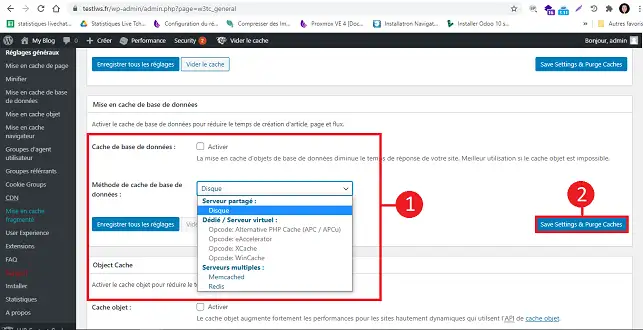
You can perform the same operation for the"Object cache" section. The Object cache allows you to cache only the results of database objects.
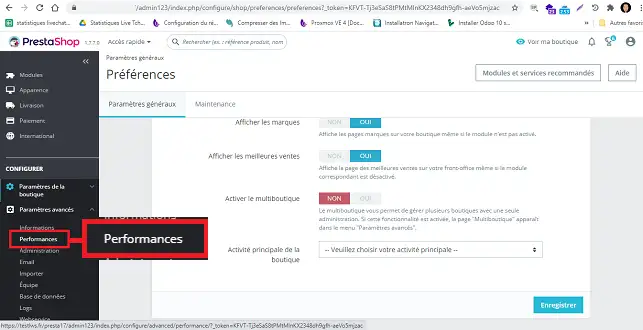
1. Connect to your Prestashop dashboard, click on "Advanced settings" and then on"Performance".
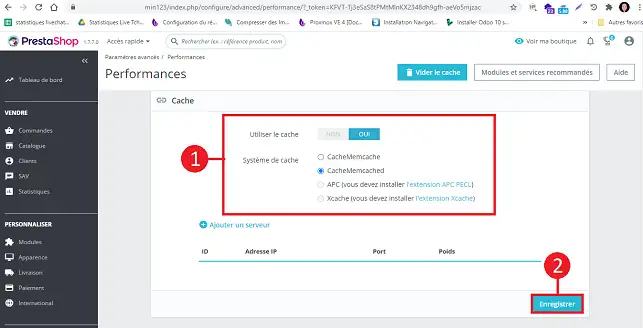
2. Go to"Cache", click on "Yes" then choose"memcache" or"Memcached" depending on the extension you activated when selecting your PHP version. Finally, click on"Save" to save the request.
You are now able to configure Memcached on your cPanel hosting package for WordPress or Prestashop. However, it should be noted that all data on Memcached is accessible to all users on the same cPanel server as yours. For this reason, it is imperative that you never store sensitive information on Memcached.
Don't hesitate to share your comments and questions.
Rate this article :
5/5 | 1 opinion
This article was useful to you ?
Yes
No
1mn reading
How do I configure Cloudflare on a website hosted on cPanel?
4mn reading
Using Redis as a persistent object cache for WordPress on cPanel
4mn reading
Speed up your site with Fastest Cache - Cache Varnish
3mn reading
How can I use IpXchange to customise the IP of your domain?